Previous Page | Right click this page to print.
Change the style sheet definitions
Modifying Pop-up Menu Positions
When adding or deleting menu arrays for the pop-up layer menus, the position of the pop-up layers may need to be modified:
- Measure the pixels down and to the left from the zero position (top left corner of the browser window) for each location of the pop-up layer.
- Open the CSS style sheet file with a text editor (Windows: Notepad or Wordpad, Mac: SimpleText).
- Find the code below in the style sheet:
- Modify the top and left attributes for each pop-up menu array (shown in bold above) to the desired screen positions.
- Save the style sheet and test the menu positions in a suitable browser.
- Note: some browsers may display abnormal behavior in the
menu placement (e.g. the menus are positioned lower than desired).
This problem currently cannot be fixed because other browsers show
the menus correctly. If testing on a browser that displays abnormal
behavior, make sure the changes made do not effect more commonly
used browsers.
- Browsers which handle the script well include:
- Internet Explorer for Windows
- Netscape 7 for Macintosh
- Browsers which handle the script well include:
- Note: some browsers may display abnormal behavior in the
menu placement (e.g. the menus are positioned lower than desired).
This problem currently cannot be fixed because other browsers show
the menus correctly. If testing on a browser that displays abnormal
behavior, make sure the changes made do not effect more commonly
used browsers.
/* This section pertains to the MouseOver Boxes. Use 'top' and 'left' to adjust the position where each box appears. */#boxA { position:absolute; visibility:hidden; z-index:1; top:120px; left:0px; clip: rect( ) } #boxB { position:absolute; visibility:hidden; z-index:1; top:120px; left:100px; clip: rect( ) } #boxC { position:absolute; visibility:hidden; z-index:1; top:120px; left:150px; clip: rect( ) } #boxD { position:absolute; visibility:hidden; z-index:1; top:120px; left:200px; clip: rect( ) } #boxE { position:absolute; visibility:hidden; z-index:1; top:120px; left:250px; clip: rect( ) } #boxF { position:absolute; visibility:hidden; z-index:1; top:120px; left:300px; clip: rect( ) } #boxG { position:absolute; visibility:hidden; z-index:1; top:120px; left:350px; clip: rect( ) } #boxH { position:absolute; visibility:hidden; z-index:1; top:120px; left:400px; clip: rect( ) } #boxI { position:absolute; visibility:hidden; z-index:1; top:120px; left:450px; clip: rect( ) } #boxJ { position:absolute; visibility:hidden; z-index:1; top:120px; left:500px; clip: rect( ) } #boxK { position:absolute; visibility:hidden; z-index:1; top:120px; left:550px; clip: rect( ) } #boxL { position:absolute; visibility:hidden; z-index:1; top:120px; left:600px; clip: rect( ) }/* Add more #box items as needed but make sure they match those in the javabox.js file and the web page. */
Formatting Pop-up Menus
Other style sheet definitions are used for the pop-up layers and can be edited in a text editor.
- Open the CSS style sheet file with a text editor (Windows: Notepad or Wordpad, Mac: SimpleText).
- Find the code below in the style sheet:
- The .bxlnk section controls the style of the links in the pop-up menus.
- The .MenuHeading style controls the format of the first menu heading in the pop-up menus.
- The .MenuSubHeading style controls the format of any other non-link
menu headings.
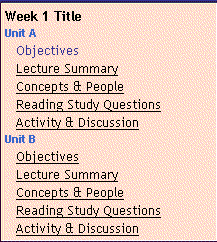
- An example is shown below:

- When changes have been made save and close the file.
 .bxlnk { color: #000000; font-size: 13px; font-family: "Trebuchet", "Arial", "sans-serif"; text-decoration: none }
 A.bxlnk:link { color: #000000; text-decoration: none }
 A.bxlnk:visited { color: #003399}
 A.bxlnk:active { color: #FFcc00 }
 A.bxlnk:hover { color: #0000FF; text-decoration: underline; background-color: #FFFFCC; }
.MenuHeading { font-family: "Trebuchet MS", Arial, "sans serif"; font-size: 13px; font-weight: bold; color: #000000} .MenuSubHeading { font-family: "Trebuchet MS", Arial, "sans serif"; font-size: 13px; font-weight: bold; color: #000000}#boxJS { font-size: 12px; font-family: "Trebuchet MS", "Arial", "sans serif" }
Previous Page | Right click this page to print.